Hugo Workshop
A step-by-step guide on how to setup a HUGO website and publish it on Github pages
Creating the HUGO site
hugo new site <username>.github.io --format=ymlSetting up git and gh repo
First change dir to the newly created site dir with cd <username>.github.io. Now initialize git in the folder.
git initNow we can add theme to our website as a submodule (yes, submodule as this give us power of clonig this repo with single command)
git submodule add --depth=1 https://github.com/adityatelange/hugo-PaperMod.git themes/PaperModnow we have to make sure that HUGO know that we want to use “PaperMod” theme.
echo "theme: \"PaperMod\"" >> hugo.ymlTo test whether the theme is working or not… run the hugo server
hugo server -D-D flag compiles the draft pages also (helpful when writing actual blogs). If all works correctly then you should be able to see first web page on localhost:1313
adding these changes and then commiting it.
git add .git commit -m '<initial commit>'Now we have to setup the GitHub repo so our web pages are hosted using GitHub pages. So we have to create our repo with the following command,
gh repo create <username>.github.io --public --push --source=. --remote=originnow we will see meaning of each flag,
--public: this creates a public repo.--push: push the local commits to the created repo.--source: and the push specified directory as the source.--remote=origin: this names the remote as origin.
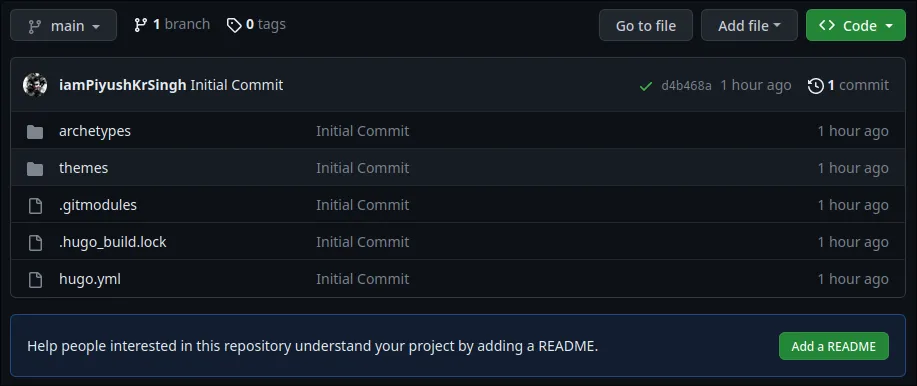
Since, this pushes the commit as well so essentially your github repo should contain HUGO files.
Customizing your metadata
Since this is our personal blogging site so we should have good landing page with showing who you are with some social media. For example, we have a defined page in our theme (see Fig).
Your current hugo.yml file should look like this,
baseURL: https://example.org/languageCode: en-ustitle: My New Hugo Sitetheme: "PaperMod"Here, we start with baseURL change it to https://<username>.github.io/ and title to whatever you want.
Now, actually at this stage this is your choice what you want to do with your website. But the following setting and options are recommended but you can definitely change them. So in the end it should look like…
baseURL: "https://anayRetard.github.io/"languageCode: en-ustitle: The Retardtheme: "PaperMod"enableEmoji: trueauthor: "Anay Kuljeet"
mainSections: - blog - archives
menu: main: - name: Home pageRef: / weight: 10 - name: Blogs pageRef: /blog weight: 20 - name: Archives url: /archives weight: 30
params: profileMode: enabled: true title: "I'm Retarded" ## optional default will be site title subtitle: "Test Website by Slashdot." author: "hehe" imageUrl: "/images/profileImg.jpg" ## optional imageTitle: "Profile Image" ## optional imageWidth: 400 ## custom size imageHeight: 300 ## custom size buttons: - name: Blogs url: "/blog"
socialIcons: - name: "Linkedin" url: "https://slashdot-iiserk.github.io" - name: "YouTube" url: "https://www.youtube.com/@piyushkrsingh" - name: "Github" url: "https://github.com/iamPiyushKrSingh" - name: "Instagram" url: "<>"Now, our main landing page is ready. But put your profile pic in static/images/profileImg.jpg.
Creating sections
Create /archives with the following command,
hugo new archives.mdand change metadata of this file as
---title: "Archives"layout: "archives"url: "/archives/"summary: archives---Adding first blog
Let’s say you are gonna record today’s experience. So let’s create our first blog,
hugo new blog/HUGO-workshop-experience.mdopen the file content/blog/HUGO-workshop-experience.md, metadata will look like,
+++title = 'HUGO Workshop Experience'date = 2023-10-14T02:53:32+05:30draft = true+++Then add the content after the data. Now, lets test the blog with,
hugo server -DAfter completing blog change as draft = false.
Setup GitHub Actions
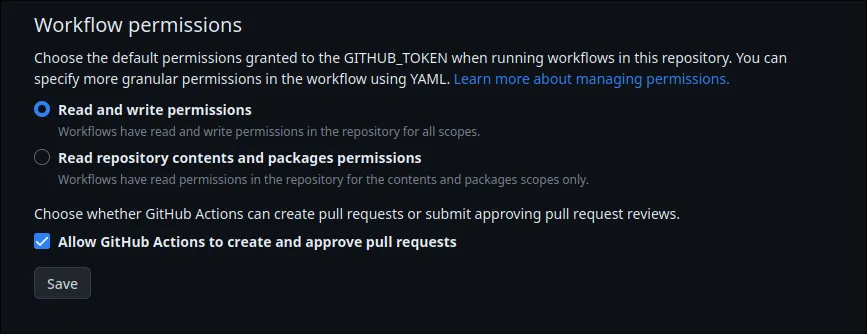
First enable read-write perms for workflow action from setting, by going into Settings -> Action -> General -> Workflow Permissions.
Let’s first create action yml file but command
mkdir -p .github/workflows && touch $_/hugo.ymlAfter creating this file, add the following thing in the file directly,
name: Deploy Hugo site to Pages
on: push: branches: - main ## Set a branch to deploy pull_request: branches: - main
permissions: contents: write pages: write id-token: write
concurrency: group: "pages" cancel-in-progress: false
## Default to bashdefaults: run: shell: bash
jobs: build-and-deploy-site: runs-on: ubuntu-latest steps: - name: Checkout repo uses: actions/checkout@v3 with: submodules: true fetch-depth: 0
- name: Setup Hugo uses: peaceiris/actions-hugo@v2 with: hugo-version: "latest"
- name: Build site with HUGO run: hugo --minify
- name: Deploy to GitHub Pages uses: peaceiris/actions-gh-pages@v3 if: github.event_name == 'push' && github.ref == 'refs/heads/main' with: github_token: ${{ secrets.GITHUB_TOKEN }} publish_dir: ./publicNow, we can push the changes to see the magic of GitHub Actions, with
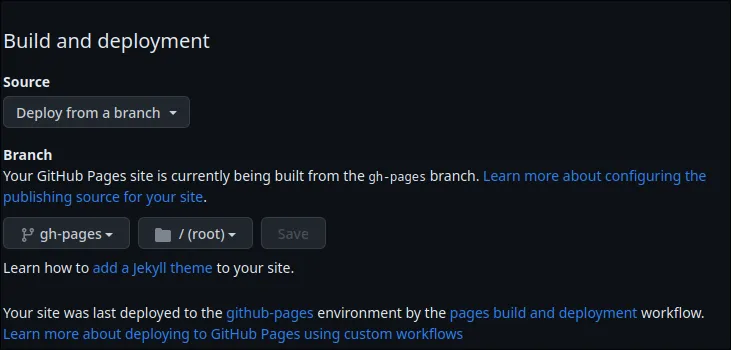
git add .git commit -m "first blog"git push origin mainNow chnage the deployment branch to gh-pages. In settings of the repo under pages, select the deployment brach as gh-pages as
Adding New Content
To add content we will add soon.